Set Up New Samsung Galaxy Phone
While Samsung Galaxy Phones are available in various models, all Samsung Phones are have a similar User Interface and the procedure to setup any Samsung Phone is more or less similar. To get the best out of your new Samsung Galaxy phone it is really important that you setup the phone right the very first time. Hence, this guide on how to setup your new Samsung Galaxy Phone. Note: The steps may vary a bit, depending on the version of Android operating system installed on your device.
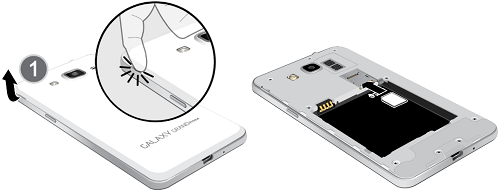
- Open back cover and Place Battery and Sim Card The very first thing to do after un-boxing your new Samsung Galaxy Phone is to open the back cover and place the battery and Sim Card in their respective slots.
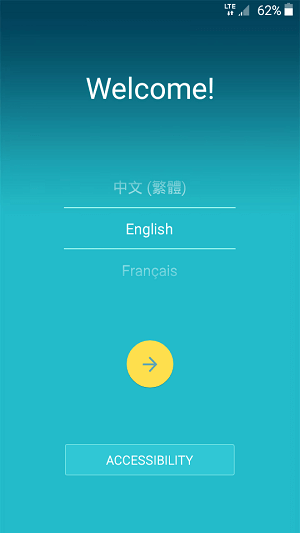
If your phone supports expandable storage, you can insert a Micro-SD Memory card into its slot. The Micro-SD card slot is immediately above the SIM card slot. Note: Make sure that you are inserting the SIM card into the correct slot with the card’s gold contacts facing the device and the angled corner of the card positioned correctly 2. Power ON the Phone After placing the battery and Sim Card, start your phone by holding the Power button until the phone vibrates or you see Samsung logo appearing on the screen. 3. Select Language When prompted, select a Language and tap on Start or Arrow button.
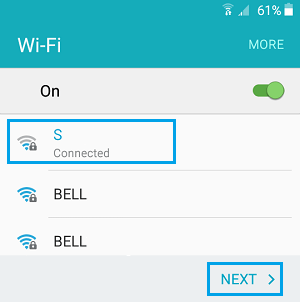
You can tap on Accessibility, if you want to setup TalkBack, Voice Access (allows you to control phone with voice) or make the display text size larger. 4. Sign in to Wi-Fi Network On the next screen, select your WiFi Network and Sign-in by entering your WiFi Network Password.
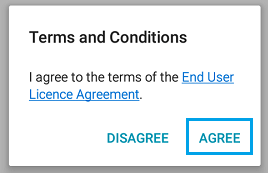
Agree to Terms and Conditions After signing into WiFi network, you will be presented with the ‘End User License Agreement’, which is an agreement between the software owner and the user (you). Agree to the Terms and Conditions by tapping on Next and them tap Agree on the pop-up that appears.
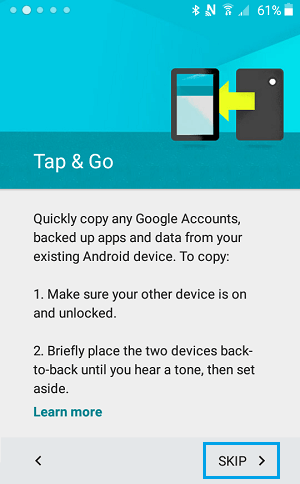
Transfer Data From Your Old Phone Using Tap and Go If you are upgrading to a new phone, you can easily transfer your data from Old to New Samsung Phone by using the ‘Tap & Go’ feature. Tap & Go is available for Samsung Phones running on Android 5.0 and above. You can find the steps to use Tap & Go in this guide: How to Use Tap & Go on Android. If you do not want to transfer data, you can skip this step by tapping on the Skip option.
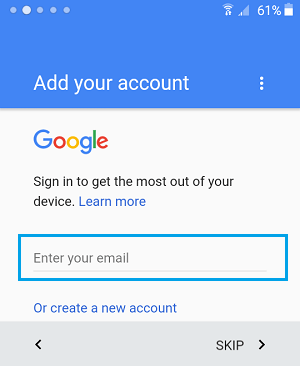
Note: You can also transfer data from Old to New Phone by using a backup of your phone. 7. Sign into your Google Account Next you will be prompted to sign into your Google Account by entering your Gmail Address and Password. If you do not have a Google Account, you can either tap on Create a New Account link or tap on Skip to move to the next screen.
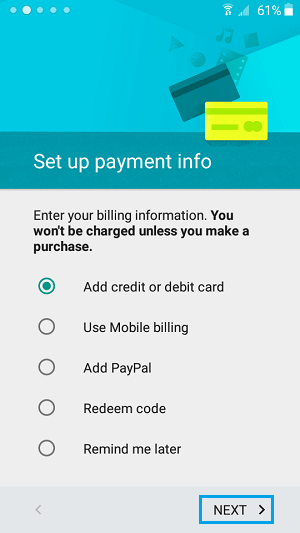
Note: Without a Google Account, you won’t be able to download apps from Google Play Store or use Google services like Google Maps and Google Hangouts. 8. Accept Terms and Conditions On the next screen, you will be prompted to Accept the Terms and Conditions, tap on Accept from the bottom right corner. 9. Select Payment Method If you are new to Android, or have never setup a payment method, you will be prompted to select a payment method now. Select Add Credit Card or Debit Card and tap on Next to continue. If you do not want to setup a payment method, select ‘Remind Me Later’ and tap on Next to Continue.
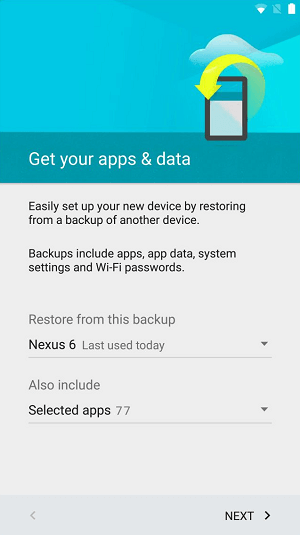
Note: You won’t be able purchase paid apps without setting up a payment method. 10. Set Date & Time Next, you will be prompted to select your Time zone, this will automatically set the date or time on your Samsung Galaxy Phone. You can also opt to manually enter the date and time on your phone. 11. Get your Apps and Data Screen If there are other devices using the same Google Account, you will see ‘Get Your Apps and Data Screen’. This screen allows you to restore your new Android Phone using a backup of another device. This is really helpful in case you want to have the same data and settings on the new phone as you have on your existing Android Phone.
This screen will basically allow you to Select the backup that you want to restore from and the apps that you want to transfer over to your new phone, by default all applications will be checked. 12. Agree to Google Services Terms and Agreements On the next screen you will be prompted to Accept Google Services terms and presented with the following options:
Back up Phone’s data, apps, etc to Google Account: Un-checking this will prevent Google from backing up your phone to your Google Account. Use Google’s Location Services: This option asks if you are willing to allow other apps access to your location and whether you want to send anonymous location data to Google. Help Improve Location Services: This option asks whether you want apps and services to scan for Wi-Fi networks. Help Improve Android Experience: This option asks whether you want to send diagnostic and usage data to Google to help improve the Android Experience
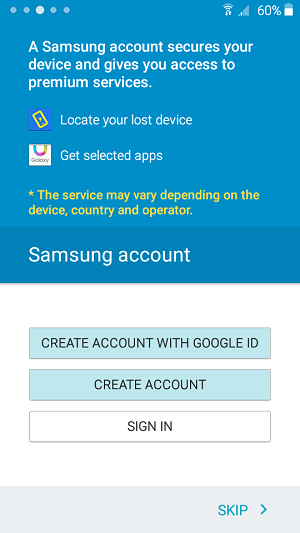
Once you are done checking or un-checking these options, tap on Next to continue to the next step. 13. Sign into your Samsung Account or Create a New One You will now be prompted to Sign into your Samsung Account or create a new account using your Google ID. If you do not have a Samsung Account, you can tap on Create Account and follow the instructions to create your Samsung Account. If you do not want to create a Samsung Account, you can tap on Skip to move to the next step.
Note: While you can use your phone without a Samsung Account, you won’t be able to use Samsung’s Locate your lost device app and other Samsung apps. 14. Agree to Samsung Terms and Conditions Once you have entered your login details you will once again have to agree to the terms.
Terms and Conditions and Special Terms: This option needs to be checked if you want to move onto the next step. Samsung Privacy Policy: This option also needs to be checked if you want to move onto the next step. Data Combination Policy: This is optional, you can also deny this and still move onto the next step
- Selected Phones: Set Wake-up Command Depending on your phone you may be asked to setup more features including: Wake-up Command: This feature allows you to control your phone with your voice and allows you to do things like making calls and opening apps by using voice commands.
- Optional: Setup Easy Mode This last step is optional, where users are presented with the opportunity to setup Easy Mode. What Easy Mode does, is make text and app icons bigger and also simplifies the design of the home screen. This completes the process of setting up your Samsung phone. We hope you enjoyed this article and that you have a great time with your new Samsung phone.
How to Use Two WhatsApp Accounts on iPhone & Android How to Use WhatsApp Without Phone Number or SIM